>
External Platform Support>
HubSpotHubSpot
Information, support and resources for how to use HubSpot.
Table of contents

Create a form
- In your HubSpot account, navigate to Marketing > Lead Capture > Forms.
- In the upper right, click Create form.
- To associate the form with business unit:
- Click the Select a business unit dropdown menu.
- Select the business unit you want to associate this form with. - Select your form type.
- In the upper right, click Next.
- In the left panel, select Blank template to start with a blank form or a pre-made template to start with a form with pre-selected fields for a specific use case. The form preview for a selected template will appear in the right panel.
- In the upper right, click Start.
- A the top of the form editor, click the pencil icon to edit the form name.
 Back to top
Add and edit form fields
- In the left panel, use the search bar to search for an existing field, or browse through your property groups. The object type of the field added can determine whether the form submission appears on the activity timeline of associated records.
- To create a new property and use it as a field on your form, click the Create new tab.
- Select the Form field type.
The Checkboxes and Radio types will display all options, while Dropdown will contain options within a dropdown.
- In the right panel, set up your form field:
- Object type: select an object type. You can add Contact and Custom object fields.
- Group: select a property group.
- Label: enter text to name the property.
- Description: enter text to describe the property. This is optional and can be left blank.
- Click Next.
- Review your property options and click Create. - Click and drag fields onto the form preview on the right to include them on your form. Fields can be placed above, below, or next to other fields.
- To edit a field's display options, click the field in the form preview on the right.
- In the left panel, edit the field's options as needed. The options here may vary depending on the field's property type, learn more about the additional field customization options available.
- Label: the name of the field that will appear on the form.
- Help text: informational text below the field's label to help the visitor complete the field.
- Placeholder text: text that appears in the input box for the field.
- Default value: a value that will be submitted for the field by default unless changed by the visitor.
- Progressive field options: select the action to take if the field has been previously submitted.
- Make this field required: when the checkbox is selected, the field must be completed to submit the form.
- Make this field hidden: when the checkbox is selected, the field will not appear on the form but can be used to pass values to contact properties for all submissions. - You can also add rich text areas between form fields to add customizable text, create headers, or add spacing to your form.
Customise your form options
- At the top, click the Options tab.
- Customize the settings for your form as needed:
- What should happen after a visitor submits this form: choose to display a thank you message to your visitors or redirect them to another page after they submit the form.
- Follow-up options: select the Send submission email notifications to the contact's owner checkbox to automatically send a notification to the contact's owner.
- Send submission email notifications to: click the dropdown menu to select the default teams or individuals to send submission email notifications to, regardless of contact ownership. Recipients set here will be overwritten by recipients set in the form options on HubSpot pages.
- Campaign: to associate the form with a campaign in HubSpot, click the Campaign dropdown menu and select a campaign. To create a new campaign instead, select Create campaign. Learn more about working with campaigns in HubSpot.
- Form and error message language: select the language for default field labels and errors displayed to visitors who don't fill out the form correctly.
- Always create contact for new email address: select this option to create a new contact record for every submission with a unique email address. If the email address submitted matches an existing contact record in your database, the details on the existing record will be updated.
- Add link to reset the form: select this option to allow visitors to remove any pre-populated fields on the form and to create a new contact on submission. When enabled, visitors can click a Not you? Click here to reset link that resets the form. This will also disable cookie tracking in the form submission, preventing any cookie overwrites.
- Pre-populate fields with known values: if a contact previously visited your site and submitted a form, and HubSpot was able to store and track their cookies, any known field values can be pre-populated on the form. This option is enabled by default. To disable this option, click to toggle the Pre-populate fields with known values switch off. Learn more about pre-populated form fields.
Style and preview your form
- At the top, click the Style & Preview tab. A preview of the form will update in the right panel as you adjust the form's styles or test its features.
- Set as raw HTML form: select this option to render the form as a raw HTML element rather than inside an iframe. Any HubSpot styling will be removed, and the form can be styled with CSS in your external stylesheet (Marketing Hub Professional or Enterprise, CMS Hub Professional or Enterprise, or Legacy Marketing Hub Basic only).
- Input options: select one of four available themes for field and button styles.
- Style: customize the form's width, fonts, and colors.
- Test: if you have progressive fields or dependent fields on this form, you can test how they'll appear to your visitors.
 Back to top
Publish your form
In the top right, click Publish to take your form live and make it available for use on HubSpot pages. You can also embed your form on an external website or share it as a standalone page.
Once a form has been published, it cannot be unpublished. If the form is embedded on an external page, you can manually remove the form embed code. However, the only way to disable the standalone form page is to delete the form.
After publishing your form, learn how to analyze your form submission data.
Add the form embed code
- In your HubSpot account, navigate to Marketing > Lead Capture > Forms.
- Create a new form or hover over an existing form, click the Actions dropdown menu, and select Edit form.
- Click the Options tab to choose what will happen after a visitor submits your form. You can choose to redirect your visitors to a thank you page or display an inline thank you message when a visitor submits your form.

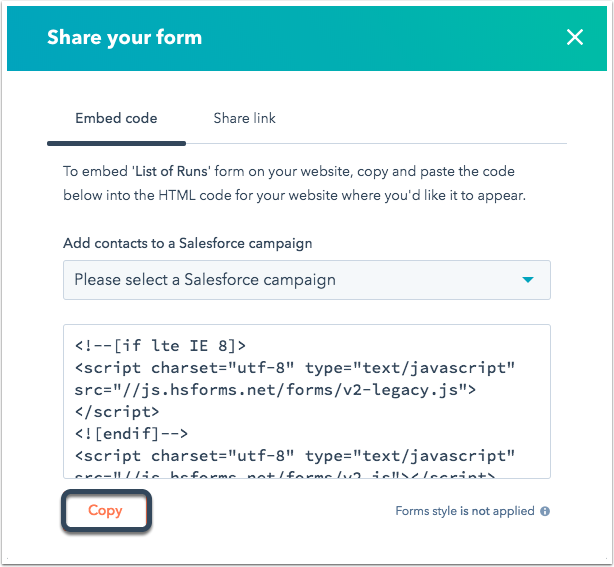
- In the form editor, in the upper right, click Share.
- In the dialog box, if you want to add contacts who submit the form to a Salesforce campaign, click the Add contacts to a Salesforce campaign dropdown menu and select a campaign.
- Click Copy.
- In the top right, click Publish.
- Paste the embed code into the HTML module on your external page. To track analytics for your form, your HubSpot tracking code must be installed on the external page where you place a HubSpot form. HubSpot will collect form submissions without the HubSpot tracking code installed but no analytics will be recorded.
Style your embedded form on external pages
Style your embedded HubSpot form on your external pages in two ways in the form editor or with CSS in your external stylesheet.
In the form editor
Theme
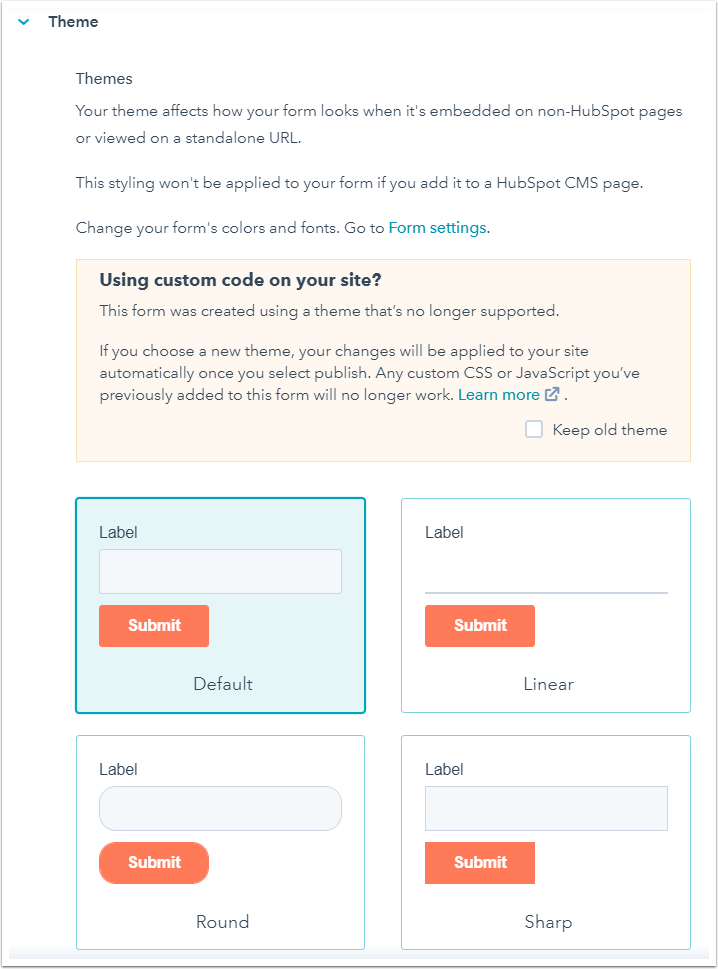
If you want to style your forms without writing any custom code, you can apply preset themes to your embedded form or standalone form page. The themes add more customization options to your forms, in addition to any global form style settings.
- In your HubSpot account, navigate to Marketing > Lead Capture > Forms.
- Click the name of a form.
- In the form editor, click the Style & Preview tab.
- In the left pane, Theme section, clear the Keep old theme checkbox.
Please note: clearing the Keep old theme checkbox will remove the former default HubSpot styling applied to this form. Any custom CSS or JavaScript you have added to the form will no longer work. This checkbox is only available for legacy forms and will not be available in any new forms created in your account.
- Select one of four themes.
 Back to top
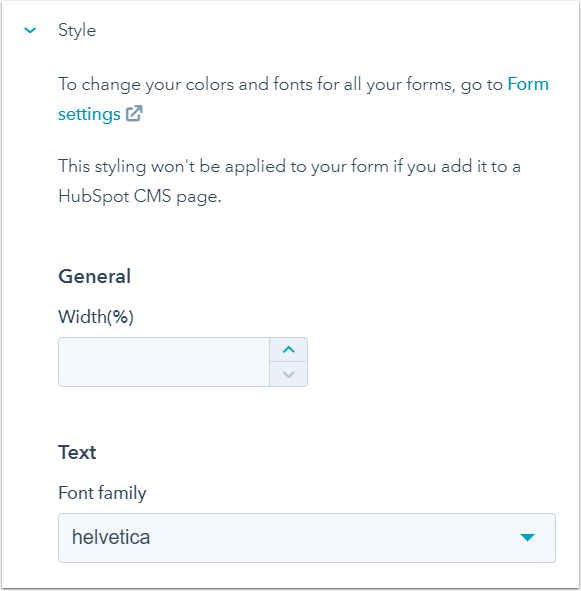
Style
In addition to themes, you can style embedded forms on a more granular level.
- In your HubSpot account, navigate to Marketing > Lead Capture > Forms.
- Click the name of a form.
- In the form editor, click the Style & Preview tab.
- In the left pane, click the > Style section to expand it. Here, you can style the form field width, font family, font sizes, font colors, and form button.
These styles are set on an individual form basis and will override global form style settings.
Please note: themes and styles set in the form editor will only apply to embedded forms or standalone form pages. Forms on your HubSpot pages can only be styled with the form module style options in the content editor.
Style form with CSS in external stylesheet
- In your HubSpot account, navigate to Marketing > Lead Capture > Forms.
- Click the name of the form.
- In the form editor, click the Style & preview tab.
- Click to toggle the Set as raw HTML form switch on. The form will render as a raw HTML element on your external page as opposed to inside an iframe, and any default HubSpot styling applied to the form will be removed.

- In the upper right, click Share.
- In the dialog box, click Copy to copy the form embed code.
- Add the form embed code to your external page. If you've already embedded your form, you must replace the existing embed code with this new, unstyled version.
- After embedding your form, you can style the form in your external stylesheet with CSS.
- Alternatively, you can modify the form embed code to make additional form customizations. As HubSpot forms are built with JavaScript, not HTML, customizing the form embed code requires the help of a developer who knows how to work with JavaScript.
Add New Client
Fill out the form below to add a new client for the Today.App